
ZED ZONE Bosses: Guardians and Mechs
ZED ZONE boss guide: the three Area Guardians, the Supreme Intelligence's three phases, the Giant Mutant Lizard, and the gear each fight demands.
ZED ZONE's bosses are not damage sponges with a single attack. Each one is an arena test: the port captain checks your cover discipline, the lab amalgam checks your close-quarters nerve, the factory warden checks your heavy-weapons plan, and the final intelligence checks all three.
This guide covers the confirmed bosses, their phases, their drops, and the loadout that makes each fight survivable. It avoids invented attack names; where the game does not document a pattern, the guide describes the arena and the safe approach instead.
Official source: ZED ZONE on Steam ↗
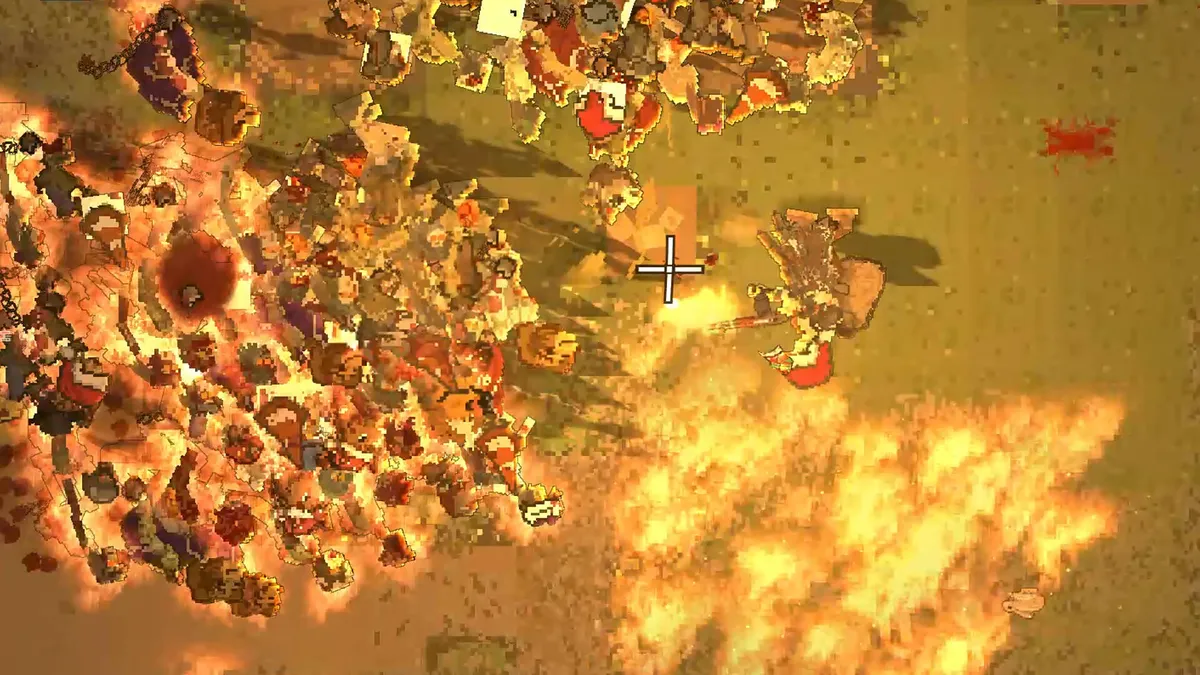
Each Area Guardian has a tell and an arena trick. Learn the pattern on the first attempt and save the heavy ammo for the phase where the armour opens.
The three Area Guardians
The guardians gate the Far Island railway. Each one, when killed, restores a section of power and drops an access device. All three devices open Area 61.
Augmented Security Captain — Port
The port guardian is the first real boss. It is a heavily augmented humanoid, and the arena is the dock: containers, cranes, and open lanes. The fight rewards cover discipline. Do not stand in the open; the captain has ranged options and adds.
Bring: a rifle with AP ammo, a shotgun for the add wave, medical supplies, and a repair kit.
Reward: the White Falcon exoskeleton. The 1.0.4 patch made a powered exoskeleton weightless and added 25 kg of armour capacity, which makes this drop a genuine upgrade rather than a trophy.
Tactics: clear the dock before you start the fight. Use a container as a hard corner, bait the ranged attack, and punish the reload. Kill the adds before they surround you; the captain's damage is manageable, the adds are not.
Corpse Amalgam — RNA Lab
The lab guardian is a mass of fused tissue. The arena is tight and full of lab equipment, which limits long-range kiting. This is a close-quarters fight with area denial.
Bring: fire (molotovs, incendiary rounds), a shotgun, and a fast melee weapon. Radiation protection is not required for the lab itself, but the route may pass contaminated areas.
Tactics: keep a pillar or a lab bench between you and the mass. Burn it when it commits to a lane, then reposition. Do not let it corner you; the room has more than one exit, and you should know both before you engage.
Reward: the second access device and lab loot. The RNA Lab is also a source of medical and chemical supplies, so clear it after the fight.
Factory Warden — Automated Factory
The factory guardian is a machine, and the arena is built for it: conveyor lines, catwalks, and heavy machinery. The Warden carries heavy weapons, including the 60mm grenade cannon and the 84mm recoilless rifle listed in the 1.0 announcement.
Bring: the heaviest anti-armour you have. A GM6 Lynx, a railgun, or a laser gun if you have one; otherwise a rifle with AP ammo and explosives. A shotgun is for the adds, not the Warden.
Tactics: fight from the catwalks and break line of sight before the grenade lands. The Warden's heavy weapons are slow; the telegraph is your window. Do not stand near a conveyor that can push you into the open.
Reward: the third access device, plus factory components. The factory is the best source of mechanical parts on the island.
The Supreme Intelligence
The final boss is in Area 61, underground. It is a three-phase fight, and the 1.0.5 patch changed the later phases:
- Phase one: the intelligence tests your positioning. Use the arena's cover and learn the audio cue for the sonic attack.
- Phase two: a three-hit sonic wave. The 1.0.5 note adds this pattern; do not treat the second phase as a repeat of the first. Move between volleys, not during them.
- Phase three: cross-fire. The arena becomes a bullet-hell pattern; the safe lane moves. Keep moving and do not greed a reload.
The boss is immune to the Supreme Intelligence active skill's stun. The skill is still useful for the adds: a 45-degree, 20-metre sonic cone with strong knockback and 1.5 seconds of stun, 15-second cooldown.
Reward: the wreck can be looted after the kill. The special equipment drop is per player in co-op; if you killed the boss before the 1.0.5 patch, the Computing Core can compensate the drop once.
Ending: after the boss, the submarine escape triggers. You can continue playing after the ending; the world does not lock you out.
The Area 61 walkthrough→ covers the route to the boss and the post-ending state.
The Giant Mutant Lizard
The lizard is a world boss, not a guardian. It sleeps in its nest during the day and hunts at night. It is fast, armoured, and hits hard.
Bring: a rifle, a fallback path, and a repair kit. A Giant Lizard Bait can lure another lizard as a distraction.
Reward: Giant Lizard Scalehide gear with regeneration, and a Lizard Serum that gives a permanent +1 attribute point.
Tactics: fight near the nest, not in the open. Use cover to break its charge, and do not try to melee it unless you have a death wish and a very good katana.
Mechs are mini-bosses
The Spider Robot, War Machine, and Combat Mech are not named bosses, but they fill the same role in a facility: a high-health, armoured enemy with ranged attacks. The rules are the same as the boss fights:
- Cover first. A mech's line of sight is its damage.
- AP ammo or anti-material. Small arms work, slowly.
- Kill the adds. A mech plus a crowd is a wipe.
- Have an exit. Do not fight in a dead-end room.
The enemies guide→ covers each mech type.
Loadout by fight
| Fight | Primary | Secondary | Key item |
|---|---|---|---|
| Security Captain | AR-15 / AK-47 | Remington 870 | AP ammo, repair kit |
| Corpse Amalgam | Shotgun / rifle | Katana | Fire, medical |
| Factory Warden | GM6 Lynx / railgun | Rifle | Explosives, cover plan |
| Supreme Intelligence | Rifle / Lynx | Shotgun | Sonic cone skill, medical |
| Giant Lizard | Rifle | Shotgun | Bait, fallback path |
The best weapons guide→ explains why these picks work; the tier list→ ranks the alternatives.
Co-op boss rules
- One caller. Someone decides when to push, reload, and retreat.
- Revive first. A downed teammate is a bigger loss than a missed damage window.
- Share the drop. The special equipment from the final boss is per player, but other loot is not.
- Do not all bring the same gun. One anti-armour, one shotgun, one rifle, one medic.
The multiplayer guide→ covers hosting and revive rules.
FAQ
How many guardians are there?
Three: the Augmented Security Captain, the Corpse Amalgam, and the Factory Warden. Each drops an access device for Area 61.
What is the final boss?
The Supreme Intelligence, a three-phase fight in Area 61. The 1.0.5 patch added a three-hit sonic wave in phase two and cross-fire in phase three.
What does the port boss drop?
The White Falcon exoskeleton. A powered exoskeleton is weightless and adds 25 kg of armour capacity.
Can I fight the bosses in co-op?
Yes. The host's world tracks the kill and the access devices; the final boss's special drop is per player.
Sources
- ZED ZONE store page ↗ — bosses and mechs.
- ZED ZONE news hub ↗ — guardian names, drops, Supreme Intelligence phases, 1.0.4 exoskeleton change.
- ZED ZONE Community guides ↗ — fight notes.
- ZED ZONE on SteamDB ↗ — build history.
More ZED ZONE Guides
ZED ZONE console commands for 1.0: how to open the console, the four working command types, and a verified item and infected ID table.
ZED ZONE crafting in 1.0: the eight workbenches, the material chain, ammo press recipes, repair kits, and the order to unlock each station.
A ZED ZONE enemies guide: every infected type, the mechs and war machines, the Giant Mutant Lizard, and the tactics that actually work against each.
ZED ZONE Far Island guide: how to repair the boat, the ten new areas, the railway power loop, and a route that reaches Area 61 without wasting trips.
ZED ZONE farming in 1.0: planting pots, twelve crops, watering and fertilizer, mushroom caves, and the recipes that make a farm worth the space.
ZED ZONE food and cooking: clean water, the campfire and hob, meal buffs, preservation, food poisoning, and the best meals before a boss.
A practical ZED ZONE 1.0 guide: what changed, which route to take first, and the systems that decide whether your run survives week one.
How to play ZED ZONE in 1.0: the full keyboard map, mode selection, save rules, and the first-hour route that gets a new survivor to a stable base.